Difference between revisions of "Category:Pengo"
From cogniteam
| Line 19: | Line 19: | ||
== First time Pengo Configuration == | == First time Pengo Configuration == | ||
| − | 1) | + | 1) Connect the Computer to the Robot.<br> |
| − | 2) | + | 2) Turn on the computer.<br> |
3) Configure a static IP and connect to a network.<br> | 3) Configure a static IP and connect to a network.<br> | ||
| + | 4) | ||
* the IP should be identical to the one in the file Pengo.Conig under the ROS_MASTER_URI paramter.<br> | * the IP should be identical to the one in the file Pengo.Conig under the ROS_MASTER_URI paramter.<br> | ||
Revision as of 13:13, 21 August 2017
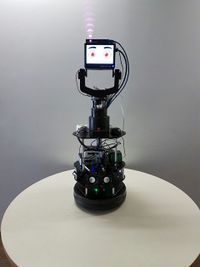
Pengo Educational Robot
Pengo includes
- 3D camera
- 2D Lidar
- Speakers
- Lilt unit
- Bumper sensor
- Battery monitoring
- Charging base unit
- 2 Linux servers pre-configured with ROS
- Screen with animation for HMI, ROS controlled
Pengo Internal documentation
Pengo (internal) documentation can be found here (Password protected) Pengo This effort is now deprecated. New systems are all open sourced.
First time Pengo Configuration
1) Connect the Computer to the Robot.
2) Turn on the computer.
3) Configure a static IP and connect to a network.
4)
* the IP should be identical to the one in the file Pengo.Conig under the ROS_MASTER_URI paramter.
This category currently contains no pages or media.
