Difference between revisions of "HamsterFilesystemResizing"
From cogniteam
| Line 26: | Line 26: | ||
[[File:Screenshot from 2018-07-15 14-29-44.png|500px]] | [[File:Screenshot from 2018-07-15 14-29-44.png|500px]] | ||
| − | From size: | + | From current size: |
[[File:Screenshot from 2018-07-15 14-30-17.png|500px]] | [[File:Screenshot from 2018-07-15 14-30-17.png|500px]] | ||
| − | To size: | + | To custom size : |
[[File:Screenshot from 2018-07-15 14-31-59.png|500px]] | [[File:Screenshot from 2018-07-15 14-31-59.png|500px]] | ||
| + | |||
| + | Click Resize/Move and Apply All Operations, applying attention message about LOSS of DATA. | ||
| + | |||
| + | [[File:Screenshot from 2018-07-15 14-38-41.png|500px]] | ||
Revision as of 11:39, 15 July 2018
After image writing follow this steps:
1. Install gparted:
daria@daria:sudo apt-get install gparted
2. Run gparted in terminal:
daria@daria:sudo gparted
3. Check your SD's partition - /dev/sd*
"*" - could be B,C etc., depends of your local environment.
!!Be careful with SD partition recognition to avoid data loosing
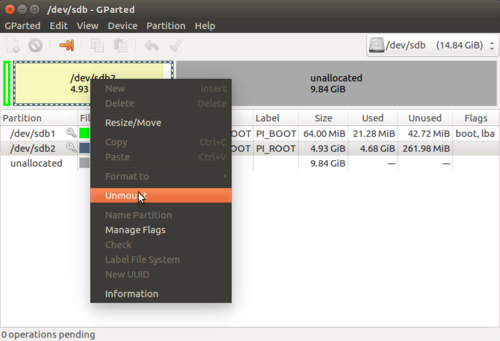
4. Select /dev/sd*2 (label PI_ROOT) partition and do "unmount" in case it mounted.
To unmount partition right click on /dev/sd*2 partition->unmount.
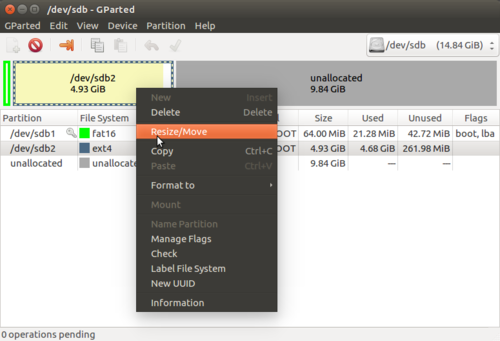
5. Right click on /dev/sd*2 PI_ROOT and resize image:
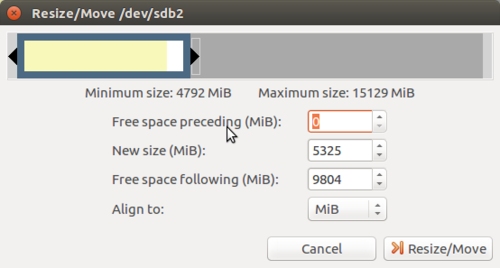
From current size:
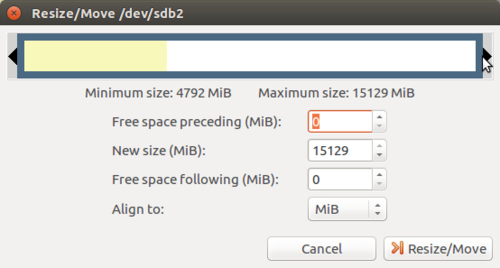
To custom size :
Click Resize/Move and Apply All Operations, applying attention message about LOSS of DATA.


