Category:Pengo
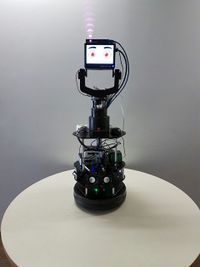
Pengo Educational Robot
Pengo includes
- 3D camera
- 2D Lidar
- Speakers
- Lilt unit
- Bumper sensor
- Battery monitoring
- Charging base unit
- 2 Linux servers pre-configured with ROS
- Screen with animation for HMI, ROS controlled
Pengo Internal documentation
Pengo (internal) documentation can be found here (Password protected) Pengo This effort is now deprecated. New systems are all open sourced.
First time Pengo Configuration
1) Connect the Computer to the Robot.
2) Turn on the computer.
3) Configure a static IP and connect to a network.
3.1) Run the command
* nm-connection-editor
3.2) This will open the graphical network manager as seen below. If you have more than one connection, select the one you want to apply the static IP to, then click Edit.
3.3) This will open the Editing Wizard dialog. It is in this box that we need to enter the information.
3.4) Go to 'IPv4 Settings' tab.
3.5) In the 'DNS Servers' input user 8.8.8.8 as your DNS provider.
3.6) In the 'Address section' choose the 'Add' option:
    3.6.1) Insert your desired static IP.

    3.6.2) Use 255.255.255.0 as your Netmask address.

    3.6.3) User your Gateway, can be found using *ifconfig command in the terminal.
4) Configure the IP on Pengo:
4.1) go to :
    * cd ~
    * pico pengo.config
4.2) Edit the parameters under 'User Settings' to have the same IP as from stage 3:
  * PENGO_IP= YOUR_STATIC_IP
  * PENGO_ROS_MASTER = YOUR_STATIC_IP
5) Reboot the computer and you're ready.
This category currently contains no pages or media.
